The Next Build(s): Two Commie Bastards
Some modelers have dozens of kits on the bench at any given time, all in various stages of completion.
I’m not the sort who could ever really work like that, but due to some delays with the Wildcats, I did find myself in a position recently where I had four different kits up and running at the same time. Now that the ‘cats are done and I’m down to two, it’s time to give them their proper introductions. Read more…
A Pair of Wildcats
Back in the 1930s and very nearly up to the eve of Pearl Harbor, the warplanes of the U.S. Navy sported one of the most vibrant paint schemes in the history of aviation, and certainly of military aviation. The silver fuselage and yellow wings are almost synonymous with that golden age of flight. While the scheme was devised to help search and rescue teams find downed planes (comforting!), it seems to radiate a certain naivety about the horrors of war that lay just over the horizon.
Is it any wonder that George Lucas chose the yellow/silver combination for those Naboo fighters in the Star Wars prequels?

When I decided to build a pair of models for the kids, I locked onto the yellow wing livery immediately. It’s the kind of thing that’s perfect for a kid’s room…heck you see variations on the theme all over the decorations at places like Pottery Barn Kids or Babies R Us or what-have-you.
The Kits
For the aircraft itself, I chose the Grumman F4F-3 Wildcat, specifically the Hobby Boss F4F-3 Early Version. There were a few other interesting aircraft to choose from, but the Wildcat’s one of those planes that, if it didn’t exactly win us the war, it certainly played a major role in keeping us from losing it, so you know, pay some respect.

I won’t bore with details of the construction. Suffice to say, the Hobby Boss Wildcats are strangely inconsistent kits. Some pieces are wonderful and downright impressive in their detail and fit. Others make you want to hurl the half-assembled plastic airplanes against the nearest hard surface.
For me, the high point of the kits were definitely the cockpit assemblies, which went together with such precision that they could stay together on their own, without any adhesives.

The low point? Well, there were several. The lower fuselage, the wing-to-fuselage seams, and the main landing gear struts were all plagued by vague fit. But I’m going to have to give the nod to the canopies, which didn’t align with the windscreens but were too thick to be posed open. These ultimately forced me to order a set of aftermarket vacform canopies and slowed things down by at least a week.

Painting
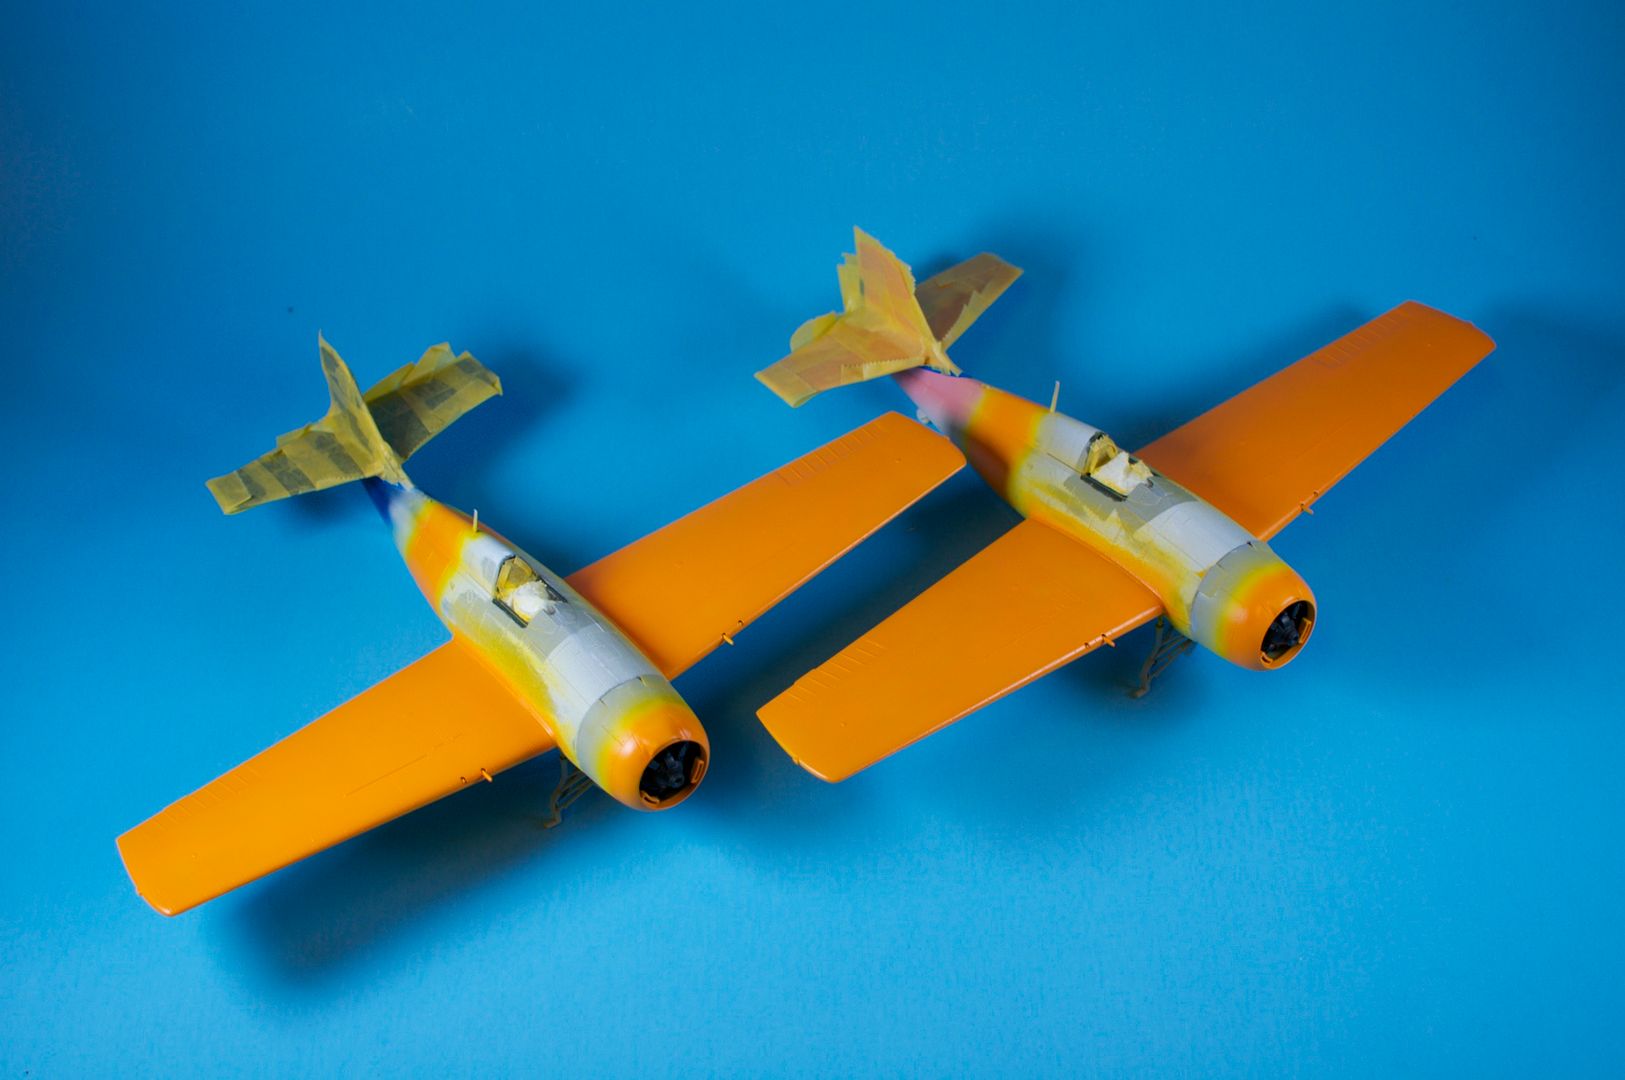
Once I wrestled the kits together, it was time to paint. Since these Wildcats were going to be getting their fair share of bright colors – yellow, pink and blue – the first step was to lay down a nice coat of white primer. Easier than it sounds. My can of Tamiya White Primer was an all around fail, and I ended up having to strip it off the wings. I ended up having to go back with Testors Classic White. Next came the colored tails – Tamiya Gloss Blue for Nolan, and Tamiya Gloss Pink for Lola, which were then masked off. Next came the yellow wings and cowl ring, which were painted with Gunze-Sangyo Orange-Yellow.

As you can see from the above picture, I’d originally intended to use the orange-yellow for the fuselage band as well, but I couldn’t seem to get the masking right, and ultimately broke down and ordered a set of wing and fuselage stripes from Yellow Wings Decals.

While I waited for these to arrive, I glued the engines in place, attached the cowls, masked off the wings and cowl rings, and got ready to paint the fuselages.
Natural Metal Finish
One of the more challenging finishes to pull off on model aircraft is the natural metal finish. Silver paint tends to look like, well, silver paint. When I was building models as a kid, there were basically two options for achieving that metal finish. One was foiling – literally covering the plane in adhesive-backed foil. I didn’t have the patience for it then, and I don’t have the patience for it now. The other option was the Testors Model Master Metalizer line, which does the job but suffers from some major durability issues.
Today there are a few more options, and I decided to use these Wildcats as a contest of sorts between two of them – Alclad II metallic lacquers and Talon acrylic metalizers. Since the Wildcats weren’t actually left in bare metal, but rather painted with an aluminum lacquer, I opted for more of a semi-matte finish. With Alclad II, this meant Semi-Matte Aluminum. With Talon, this meant straight-up Aluminum without any polishing powders.
Both paints call for a similar application of light, misting coats to build up coverage in layers.
The Alclad went down without a problem and built up well in consecutive layers. But…for semi-matte…it went down very flat. I have to admit it has me wondering what their Dull Aluminum looks like. Is it just grey?
The Talon gave me a few problems coming out of the airbrush. It seemed to get hung up in the nozzle until I had the trigger pulled back to about 75% throttle, when it would just come gushing out. I suspect user error is probably to blame. Maybe I didn’t mix the paint thoroughly enough. Maybe I didn’t clean the airbrush as thoroughly as I thought after spraying the Alclad. Maybe the Iwata’s 0.3mm nozzle is just too fickle. Whatever the case, it made the light, misting coats somewhat of a challenge, but I managed to get the paint down well enough, and with the exception of a small area aft of the cockpit on the starboard side, everything came out looking uniform and clean.
In terms of the final verdict…it’s tough to tell. I think the Talon (applied to Lola’s pink-tail) looks closer to metal, but then I wasn’t playing with one of Alclad’s “proper” metallic finishes like Duraluminum. Of course, I didn’t bring polishing powder or a buffing wheel to bear on the Talon, either. And I haven’t been able to test how well either hold up under masking. So at this point I guess I’d have to say it’s a tie, with maybe a slight edge to the Talon.
Either way, I’m looking forward to playing with both again, and considering the number of aircraft I’ve got on deck with either partial or full bare metal finishes (at least six!), I’m sure I’ll have plenty of opportunities.


Decals and Finishing Up
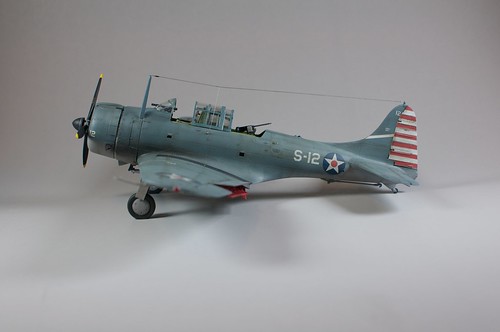
Once the fuselages had time to cure, I moved on to the decals and finishing touches – painting up the final details, unmasking and attaching the canopies, and such. Keeping in mind that these planes are for the kids, I opted to leave a lot of the fragile details – pitot tubes, aerial wires, etc – off.
The decals themselves – a mix of Yellow Wings stripes and national insignia, Aeromaster ID letters, and a smattering of kit decals – went down surprisingly well, though in the case of the Yellow Wings stripes it took some aggressive applications of Solvaset (the BFH of decal solvents) to get them to settle down over and into the surface details.

In the end, I’m quite happy with how these two Wildcats turned out, and I’m looking forward to applying the many lessons learned as I move on to future kits.
If you want to see more pictures of the build process, head on over to the Flickr Album. And if you want to see the real nuts and bolts of the build process, check out the Photobucket Album. I’ve started using Photobucket as my main repository for in-progress photos to keep them from completely overtaking the Flickr photostream.
Next up, two Soviet fighters that played no small part in driving the Germans out of Mother Russia – the Lavochkin La-5 and the Yakovlev Yak-3…
Geekfest
When I was building models as a kid, I never went to any model shows, entered any contests, or participated in any modeling clubs. Probably because I didn’t know they existed.
So when I went to my first model show/contest thing today, I had no idea what to expect.
Honestly, it reminded me a lot of the baseball card shows my dad used to take me to as a kid. Except instead of trading cards and other random collectibles, the dealer tables were stacked to overflowing with model kits, decals, accessories, and the like.
On whole, I came away with five kits for a total of maybe $65, and probably just took my collection from kits-to-be-built to a bonafide stash.
Briefly, here’s a rundown of what I picked up.
Tamiya F4F-4 Wildcat

The Wildcat is the short, stubby fighter that – if it didn’t win the war in the Pacific per se – it certainly played a big role in keeping us from losing it. I’ve just finished two F4F-3s in pre-war livery for Nolan and Lola, and I’m looking forward to building this one in full wartime garb, probably representing either an aircraft of the “Cactus Air Force” operating of Guadalcanal in 1942, or John Thach’s ride.
Eduard Lavochkin La-7

I’ve really been enjoying the two Soviet planes that I’ve got on the bench. They’re interesting subjects that I don’t know all that much about, and the kits are both really well engineered in their own ways. They’ve gotten me on something of a Soviet kick. This Eduard La-7 falls in the sweet spot. Subject-wise, this is sort of the ultimate evolution of the La-5 I’m working on right now. Kit-wise, it shares a lot of its engineering philosophy with the Yak-3. Since this is one of Eduard’s “Profi-pack” editions, it also includes photo-etch bits, canopy and wheel masks, and six different marking options (half of which look impossible to mask and paint!).
Hasegawa P-40E Warhawk

The P-40 is one of those classic warplanes that everybody recognizes. Most people may not be able to put a name to it, but everyone has seen the P-40 somewhere in their lifetime, probably sporting the snarling shark’s mouth markings. I’ve had this kit on my list ever since I started getting back into this hobby. It’s very highly regarded, but it’s always been priced into the stratosphere. Today, I managed to snag this one for $15 and didn’t look back. A peak inside the box reveals that, yeah, from a detail perspective at least, it lives up to it’s vaunted reputation. And marking-wise, it’ll be another in the line of Texas-themed aircraft I seem to be accumulating…
M4 Sherman Early Production

Outside of aircraft, I’ve been itching to try my hand at armor again. I built a few tanks when I was growing up, and always had fun with them. The Sherman strikes me as a good re-introduction. Dead-simple paint job and a track design that works well with the supplied vinyl tracks. That, and Fine Scale Modeller has been running a series on painting and weathering Shermans that I’m going to use as a primer to all those techniques I’ve been missing out on.
Soviet KV-2 ‘Gigant’ Heavy Tank

I’ve developed a strange fascination with the KV-2 after seeing someone building up Trumpeter’s kit in one of the group builds I’m participating in. It’s just a ridiculous design. Given that giant slab-sided turret, it’s easy to assume these early-war tanks were easy targets for the invading Germans. Far from it. The armor on these monsters was so thick that German tanks couldn’t knock them out, and had to call in either artillery or aircraft to finish the job. There’s an account of one KV-2 holding a bridge against an invading German force all by itself for hours until it literally just ran out of ammo and had to be abandoned. Unfortunately, it was also about as fast as that person who reaches for their checkbook at the grocery store, and used poorly by the Soviets. Either way, a worthy and interesting subject I look forward to taking on.
So…that’s my score. Maybe next year I’ll be back to set one of these on the contest tables…
Rapid Task-Switching
I don’t multitask. Never have, probably never will. My brain just isn’t wired that way.
Instead, I practice something I read about a few months back – rapid task-switching. It’s a practice that looks like multitasking from a distance, but it’s actually a way of single-tasking by breaking larger projects down into a series of mini-projects. This way I can focus on knocking out a task for one project, then shift it to the back burner and pick up a task for another project, and so on. I’ve found it’s a great way to deal with a lot of projects more or less simultaneously without going insane.
And I’ve been doing a lot of rapid task-switching lately, both at work and at home.
Case in point – the model bench.
At the moment, I’ve got four different builds going on. I didn’t exactly plan it this way. My intention was to build Nolan and Lola’s Wildcats simultaneously, since, apart from the tails and metal finishes being used, the builds are identical. But then those got sidelined waiting for parts, so I kicked off the Zvezda Lavochkin La-5 to fill the void.
While I was at it, I also started in on the Eduard Yakovlev Yak-3. First, because it shares cockpit and underside colors with the La-5. Second, because it’s a very simple kit with relatively few pieces.
And now, they’re all progressing in sort of mini-builds.
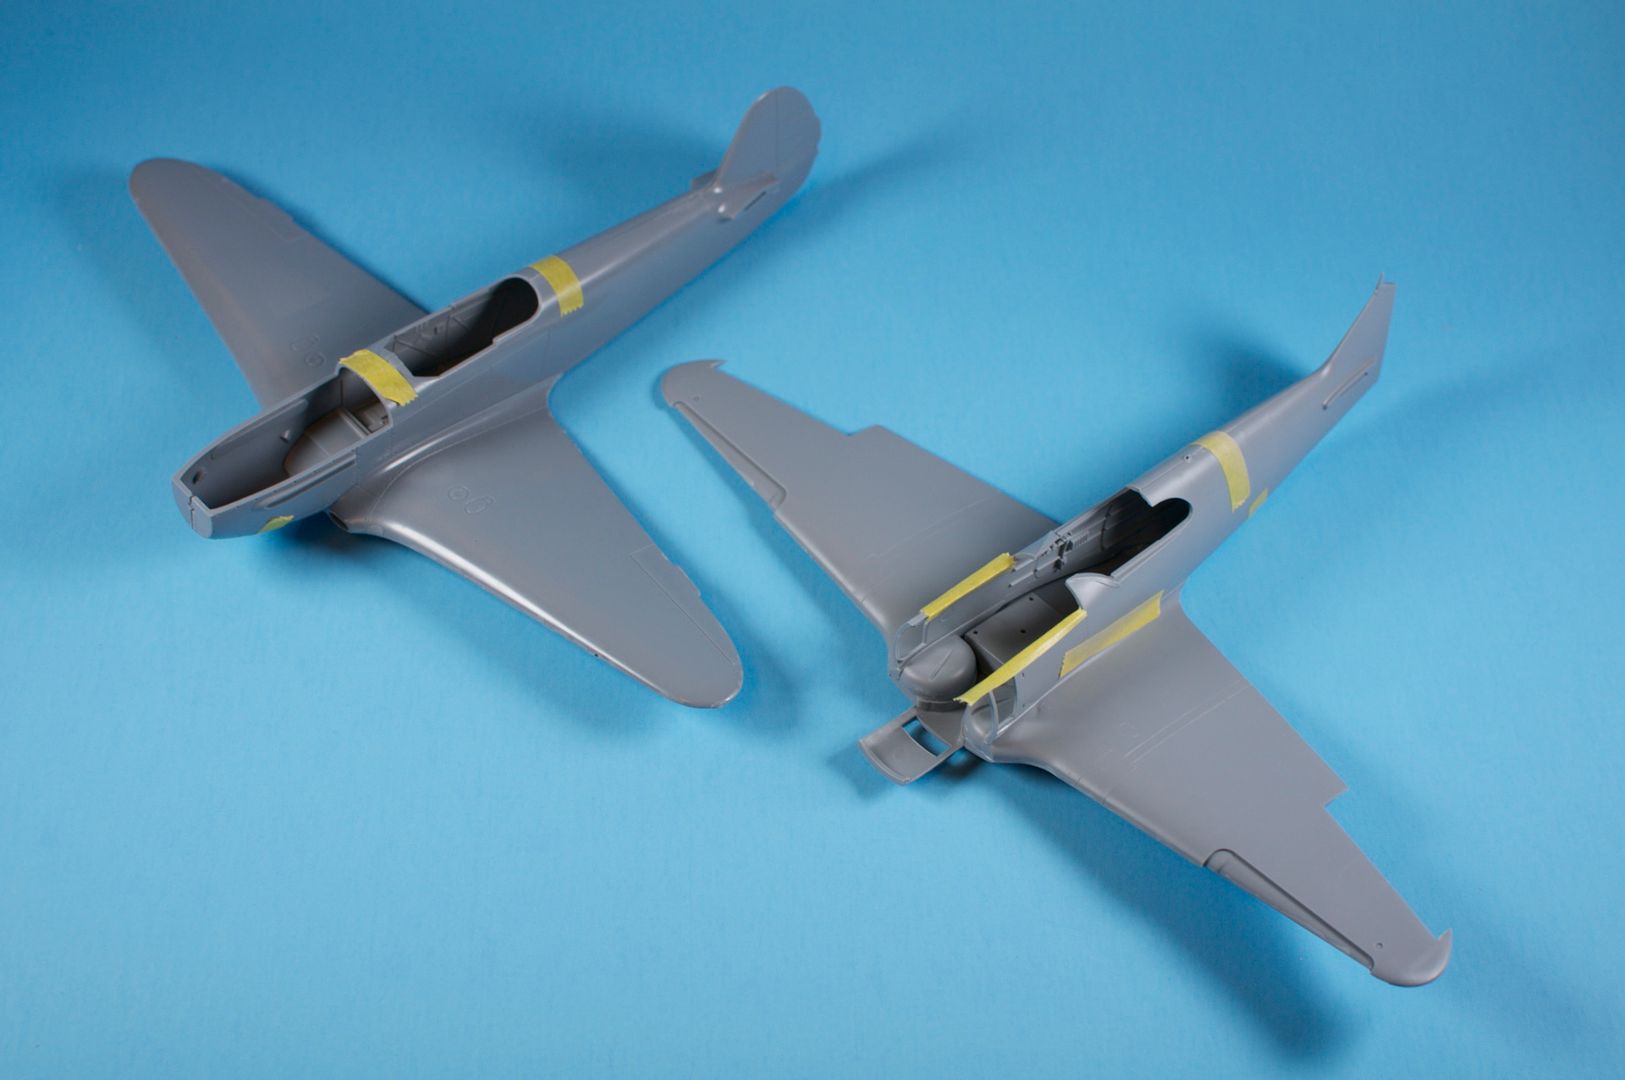
The Wildcats are certainly the farthest along. As of now, the wings, cowls, and fuselage bands have been painted orange-yellow, and the engines and cowls have been installed. Next comes masking, then the black pinstriping for the cowl and fuselage bands, then primer, then a polishing sand, then the metal finishes.
The La-5 and Yak-3, meanwhile, continue to progress through the cockpit build phase. So far, everything is going great with these two kits. Both are completely different from one another. The Yak is about as simple as a kit can get, but still boasts Eduard’s typically crisp detail. The Lavochkin, on the other hand, is almost absurdly complex, requiring that you build out the full internal structure of the aircraft, though, remarkably, all this complexity leads to a wonderful fit. And the detail Zvezda’s put into this kit marks them as a major up-and-comer in the industry.
The Yak-3 (left) and La-5 (right)

La-5 cockpit and internal assembly
Unstuck
Crappy canopy alignment issues solved.
Before:

After:
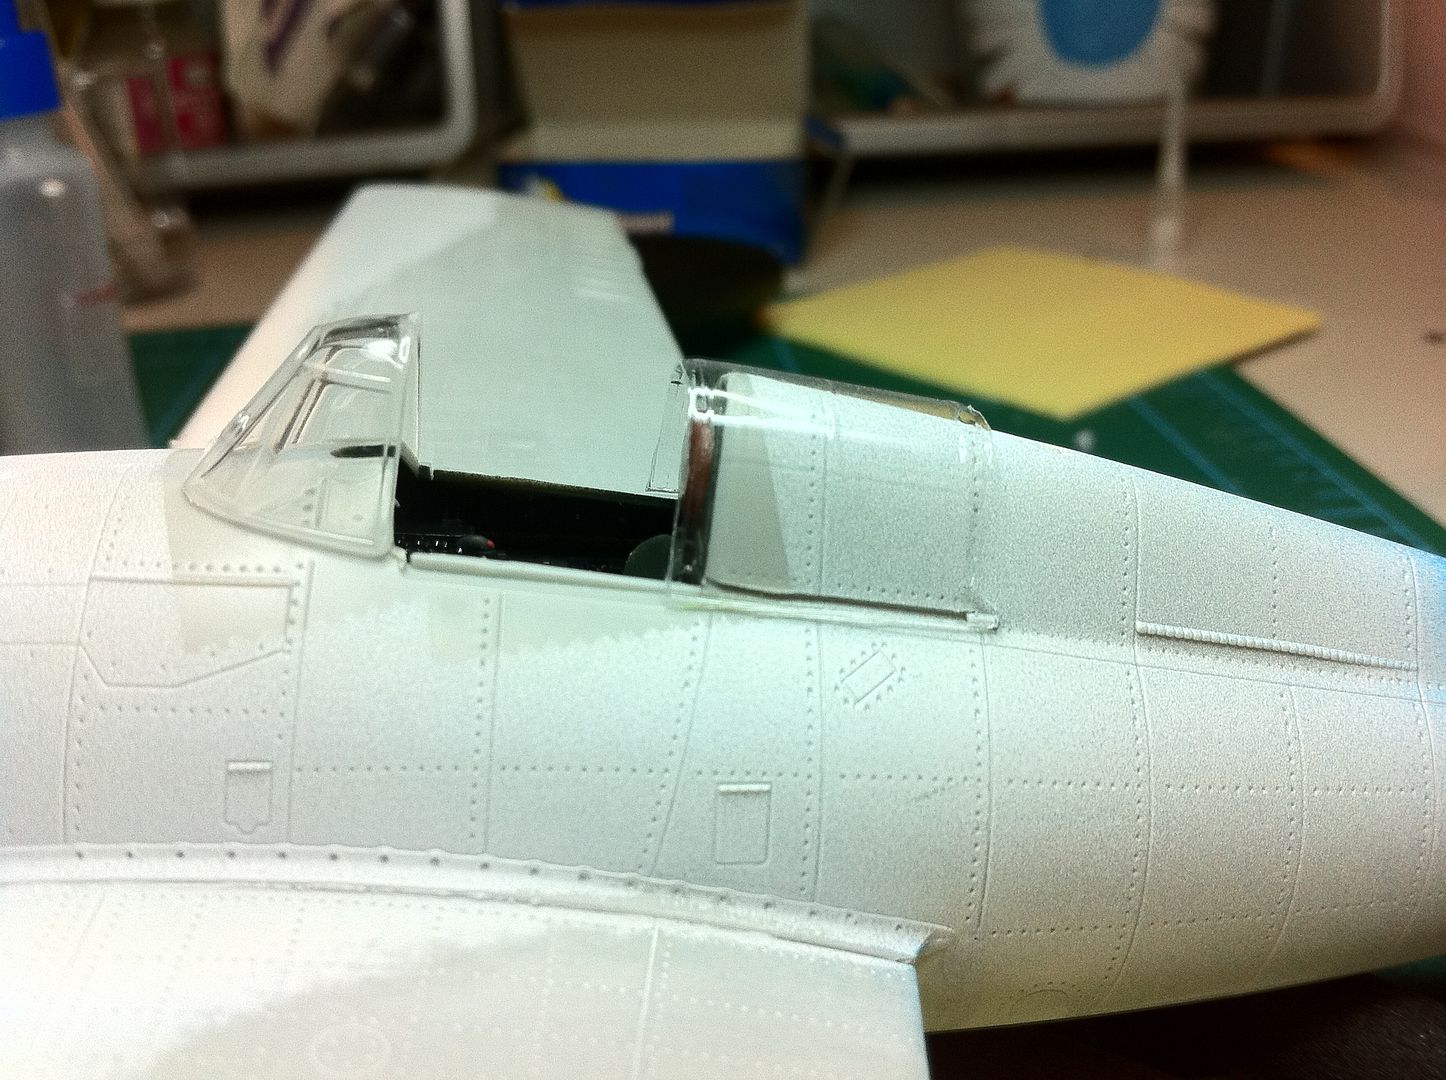
The solution? Aftermarket vacuform canopies. Which, let me tell you, are an absolute treat to cut away from their backing sheets. Freehand. With a scalpel blade. The windscreens ended up being useless, but the main canopies are thin enough that they can be posed in the open position no problem.
Looking forward to masking and getting on to painting.
Stuck
These Hobbyboss Wildcats have been staggeringly inconsistent. Some of the pieces are just perfect. Detail and fit are spot on. Hell, the entire cockpit assembly can hold together without any sort of adhesive. But then you turn around and there’s this part that just doesn’t fit.
Still, they’ve gone together very quickly, and apart from primer, they’re pretty much ready for paint.

Well, they’re almost ready for paint except for two issues…
First, I’m planning on laying down the tail colors and the yellow wings and fuselage bands first, then masking them and painting the natural metal finishes. However…I’m still waiting for my Gunze-Sangyo Orange Yellow paint to arrive.
Second, I discovered during the course of assembly that the canopies have a severe misalignment issue. Specifically, the windscreens are too tall. This wouldn’t be a problem at all if the main canopies could be posed open, but they’re too thick to fit the fuselage. And, posing them closed, the misalignment is apparent, even after attempting to carefully file down the bottom of the windscreens.
In addition to the paint, I’ve got two vacuformed canopies on order (at a whopping $3 each!). But my attempt at just-in-time manufacturing has hit a snag. I still haven’t received shipping notifications for anything, and it generally takes 3-5 days for things to arrive once they ship. All of which means the soonest I’ll see the paint and canopies would be Wednesday. I have a few more things I can do on the Wildcats – paint the wheels and props, attach a few small remaining bits – but for the most part I’ve hit an impasse.
So while I wait, I’m going to crack open the next kit on the list: Zvezda’s 1/48 Lavochkin La-5.
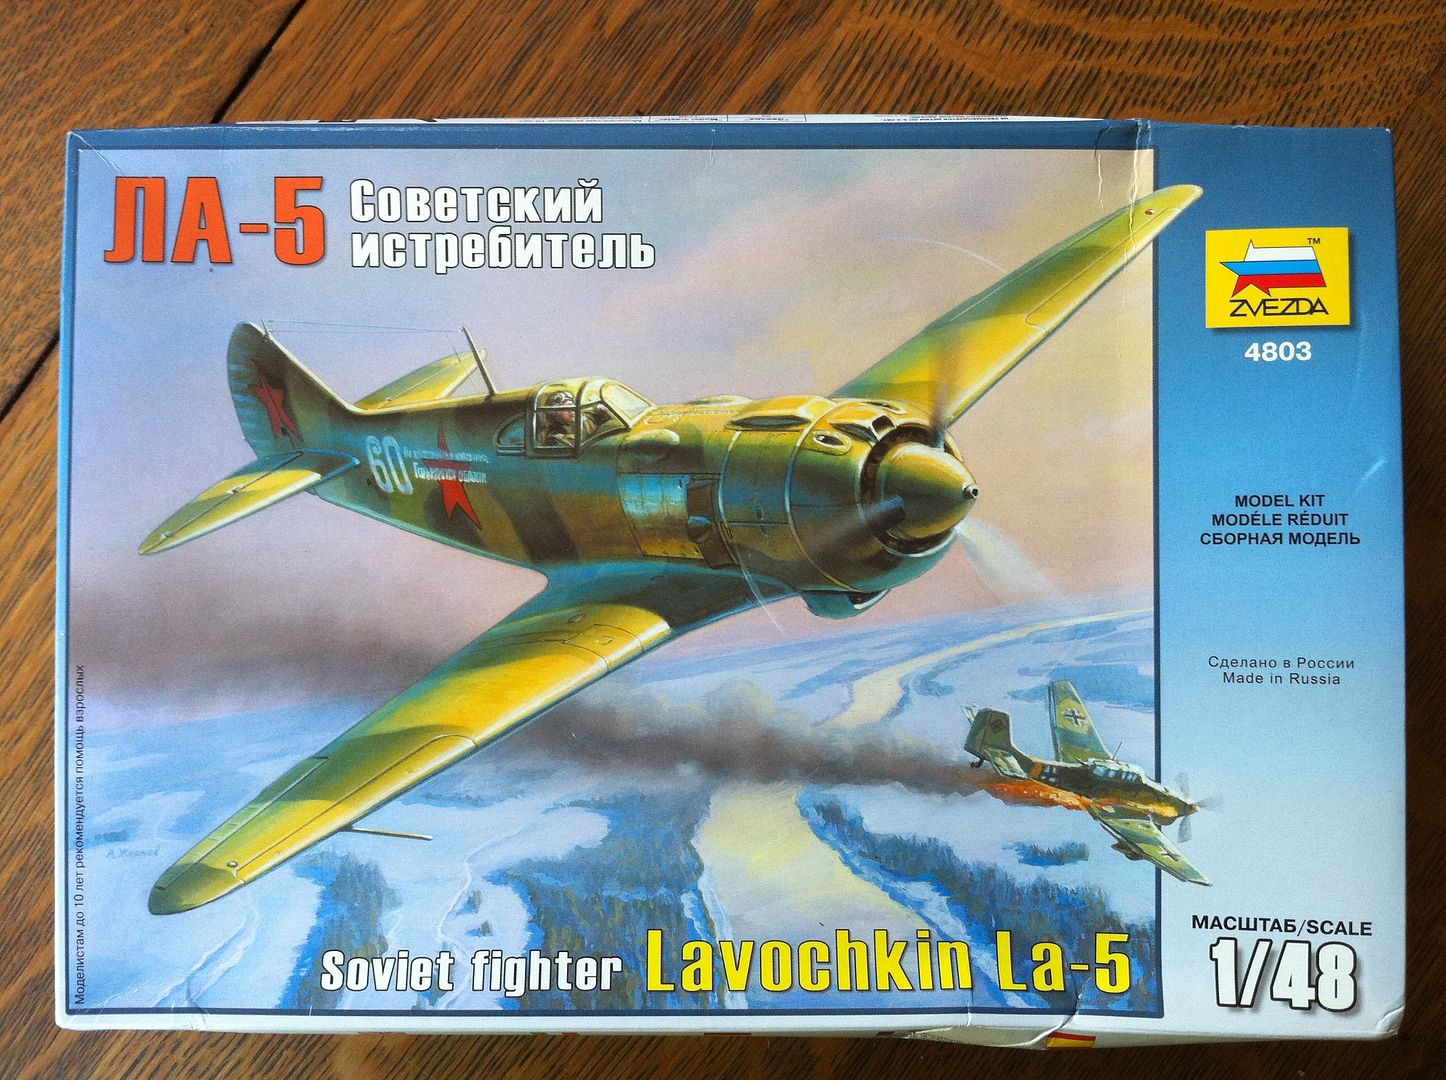
Like so many aircraft that started to reach the front in 1943, the La-5 has a wonderful development tale. In this case, it starts with the Lavochkin Lagg-3, which boasted a solid airframe but an absolutely anemic engine. Pilots hated it, Stalin got pissed, and began reallocating Lavochkin’s factory space to rival Yakolev. Lavochkin himself spent a winter in a hut beside an airfield grafting the more powerful M82 engine on to the Lagg-3 airframe, with the result being the La-5. Given proper power, the La-5 shone, and with the Mig-3 and Yak-3, emerged as one of the best fighters over the Eastern Front. Not bad, considering half or so of the aircraft was made out of wood.
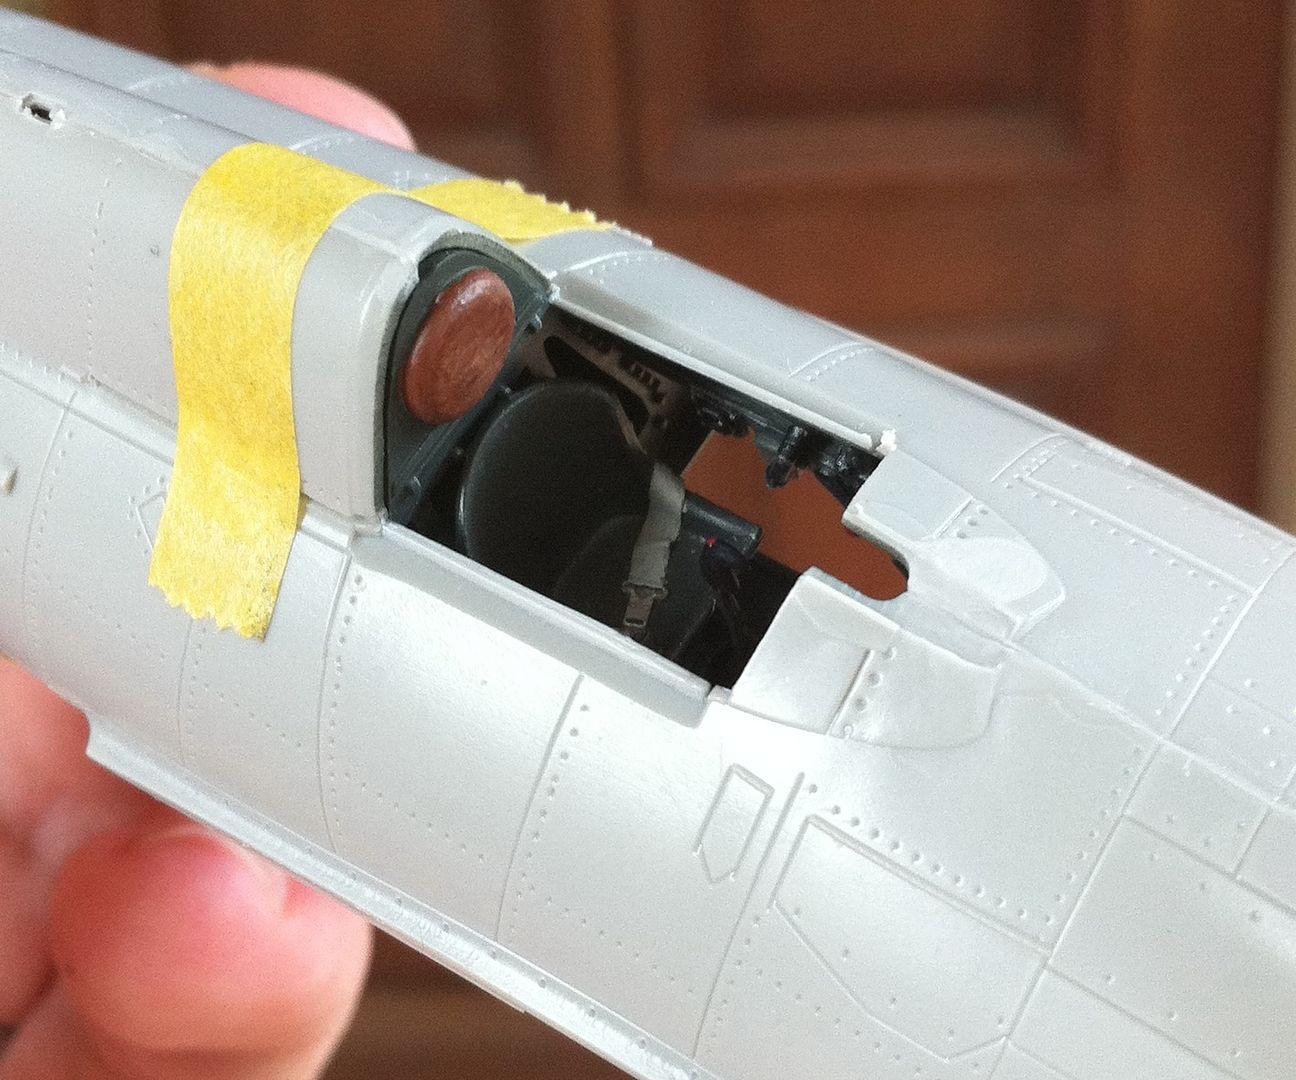
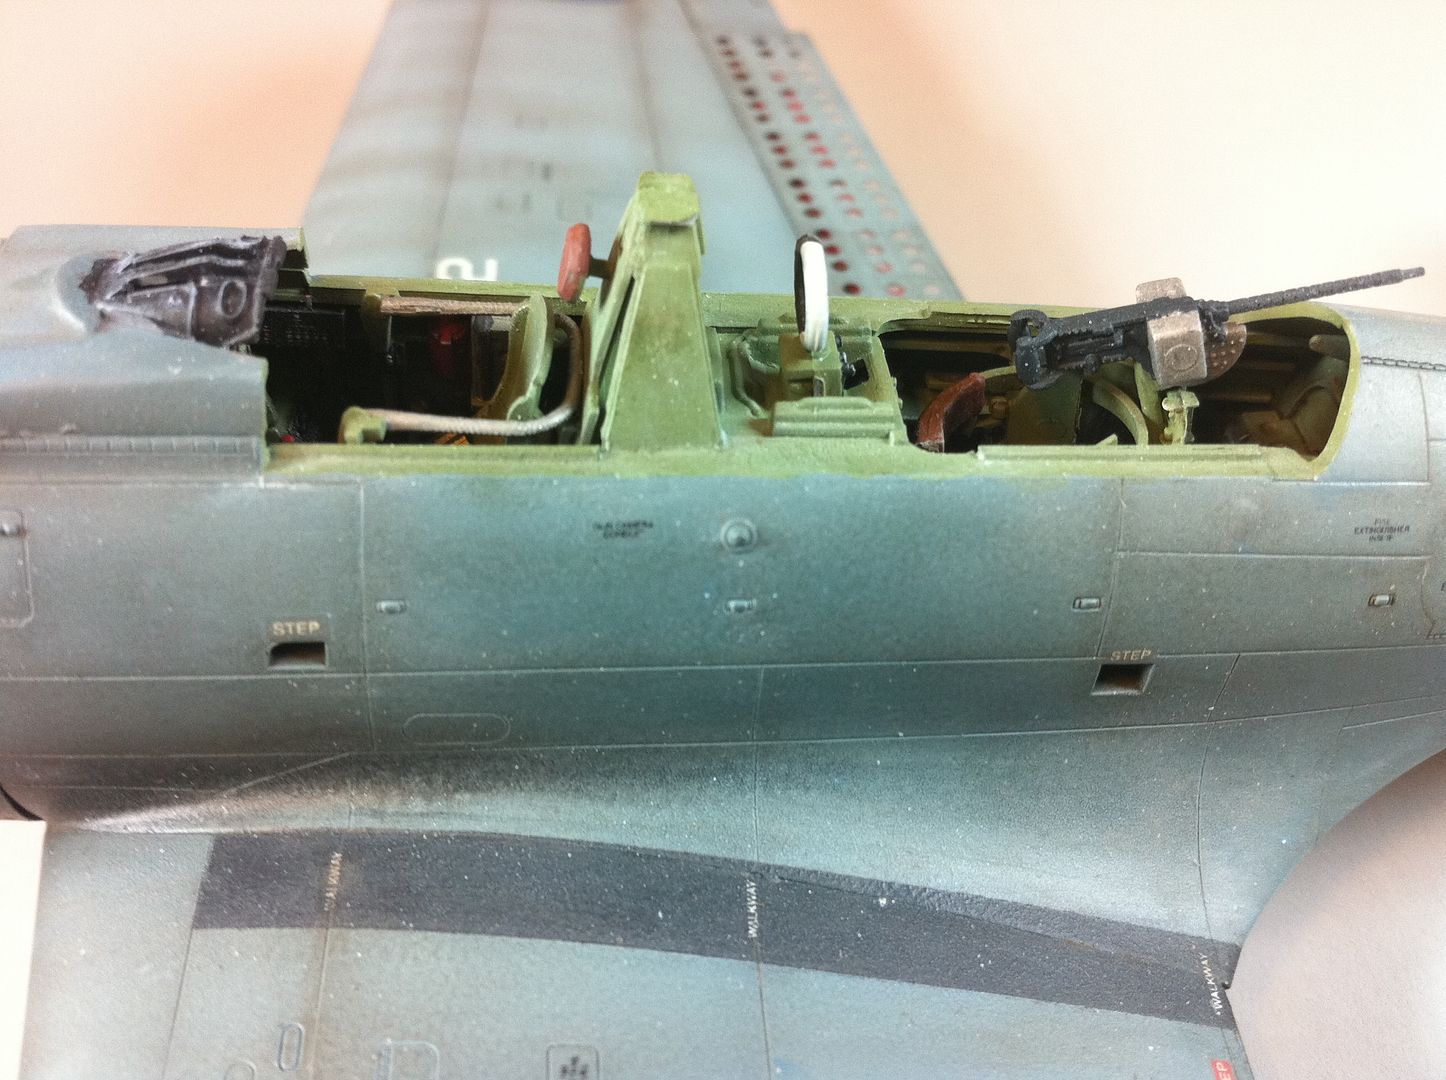
What You Don’t See…
One of the lessons I learned building the Dauntless was the futility of super-detailing cockpits. Even on a plane with as large a greenhouse as the Dauntless, everything but the seats, control stick and instrument panel is obscured by the fuselage and more-or-less impossible to see.
With the Wildcats, I decided to take a much more lax approach. No photo etch accessories. No super-detail painting. Instead, I airbrushed everything bronze green, painted the necessary bits black, drybrushed with silver to bring out some details, laid down a dark wash to add shadow detail, then added a few touches of red for various controls. I also added seatbelts made out of painted strips of masking tape and buckles snagged from some spare PE belts. That’s it. All in all, I spent probably a fifth the time on both cockpits combined that I spent agonizing over the Dauntless’ office.
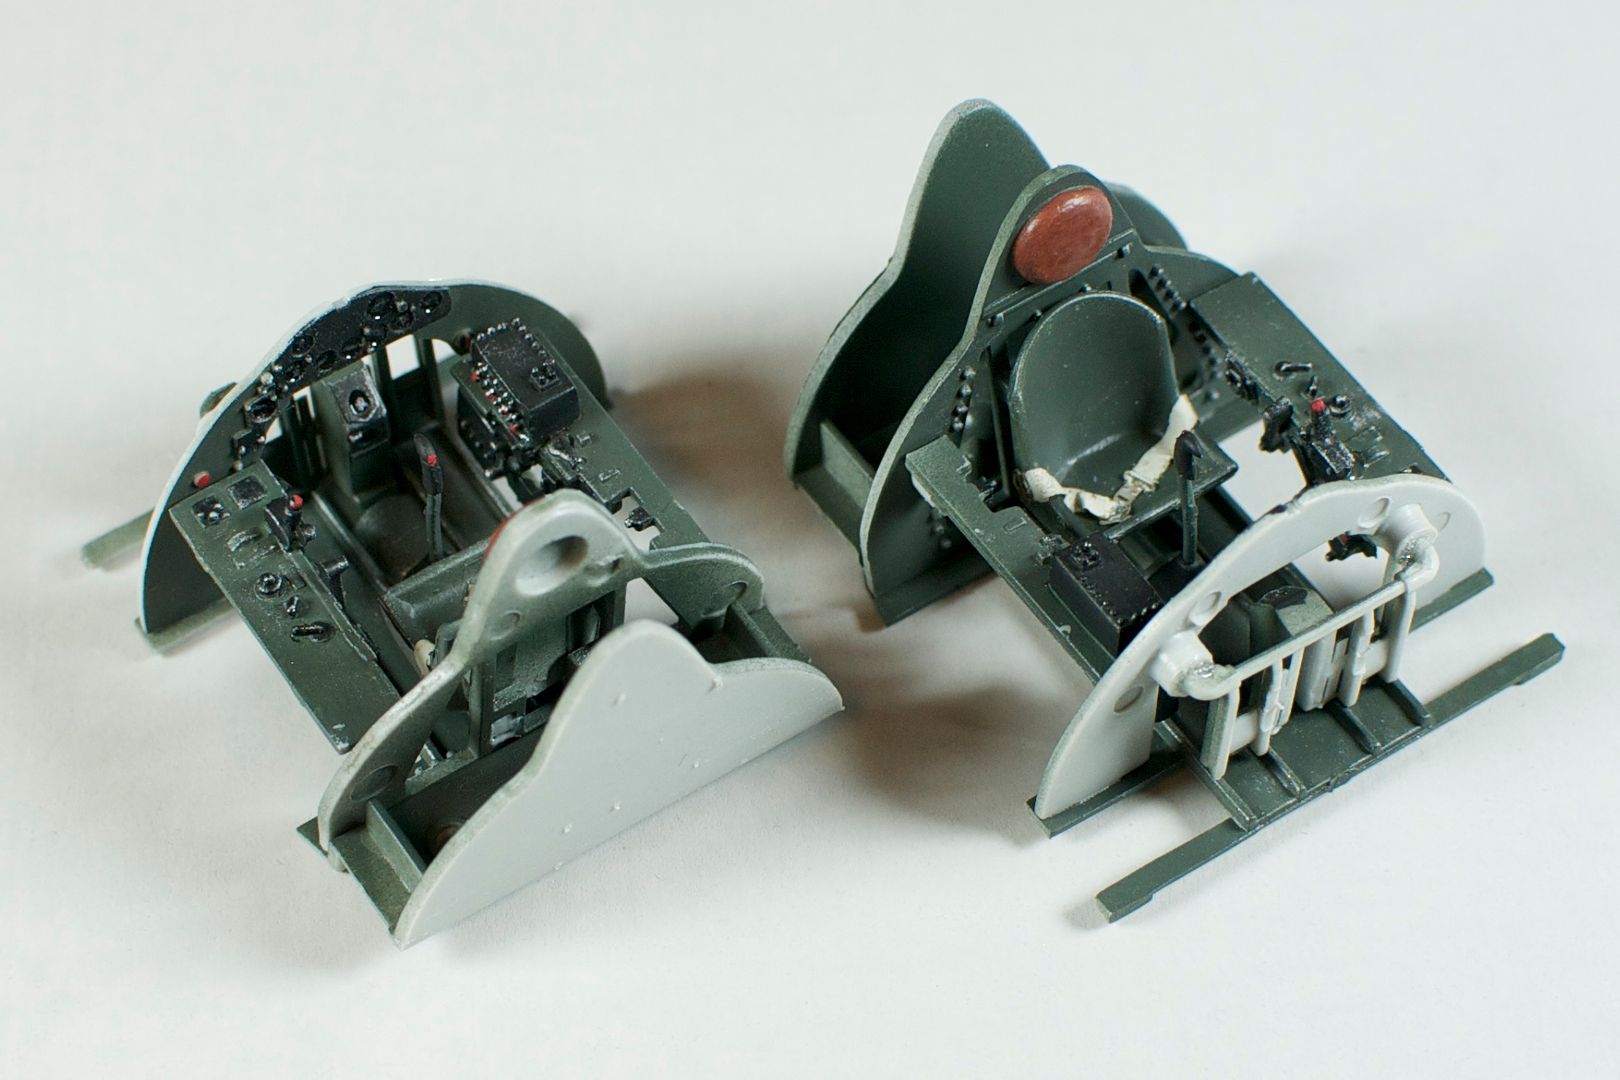
Overall, I think they look pretty damn good.
But now that they’re closed up in the fuselages…you can’t see much more than the headrest and seats…
The Next Build(s): Grumman F4F-3 Wildcat
When I got back into modeling, one of the first things I decided to do was build an airplane for Nolan. Something bright, with lots of bold colors. Of course, those types of paint schemes tend to take a lot of planning and masking, so it seemed a good idea to get my feet wet with one or two other kits first. Thus the P-51B Mustang and the SBD-3 Dauntless.
Next up? The Grumman F4F-3 Wildcat, in its pre-war yellow wing livery.
But not just one Wildcat. This time around, I’m going to be building two simultaneously. One for Nolan, and one for Lola.
My plan is to take the overall yellow wing livery, but customize it for the kids. Yellow wing (the wings were yellow to aid search and rescue efforts…which had to have been highly confidence inspiring…) Wildcats sported colored tails – black, green, etc. For the kids, I’m going to stay with the colored tails, but Nolan’s will be blue, and Lola’s pink. These will be matched with wing stripes, and each plane will have customized ID markings. N-LN for Nolan and L-LA for Lola.
As with the Dauntless, I’m planning to use these Wildcats as testbeds for new paints and techniques. In fact, I’ve already been experimenting with making my own seat belts out of masking tape. So far, I’m extremely happy with them. Much easier to work with than photo etched seatbelts (though I did snag some PE bits for the the buckles and such).

The other big test? This time, it’s natural metal finishes. Making a jumble of polystyrene parts look like painted metal is hard enough. Making them look like bare metal (or, technically, bare alclad – aluminum cladding – panels) is another thing entirely. There are several paints out there that can yield this bare metal look, and I’ll be trying out two of them. Alclad II lacquer, and Talon acrylic. The Alclad II is a semi-known quantity, and I know it can yield awesome results. But lacquers are really, really toxic. The Talon, meanwhile, is acrylic, is said to smell of oranges, and can clean up with water.
It’ll be interesting, having a sort of NMF-off between the two.
More to come.
Slow But Done
The SBD-3 Dauntless is done.


I’ll admit, I’ve had more enjoyable builds, and I’m ready to have this one off the bench. Overall, it’s a really solid kit, but between the over-engineered cockpit that you can’t even see and several frustrating fit tolerances toward the very end, I can’t call it a phenomenal kit. Still, it gave me a chance to experiment with several new techniques and taught me a ton of lessons about what I’m doing right – and what I’m doing wrong.
Finishing this kit was definitely a slog. First because of the aforementioned fit tolerances. These included several clear pieces that were a millimeter or so too wide – enough to ensure that they didn’t fit. Most of these were filed down until I could shove them into place. One tiny piece was too small to even hold in such a way as to file it, and ended up vanishing into the garage floor.
Mounting pins also proved troublesome, both on the propeller shaft and on the landing gear. In each case they had to be trimmed back in order to properly seat the tires and prop…though pulling the prop to address this problem resulted in ripping the crankcase and ignition wires off the engine. Oops.
Lastly, the canopy fit proved to be atrocious. The windscreen doesn’t line up with the lines of the aircraft, and clearly isn’t supposed to, except in real life. Accurate Miniatures even added little tabs to their one-piece canopy to address this, but did nothing for the “leave it open” configuration. Then there’s the stacked canopies, which…don’t stack properly. I ended up having to bust out the file and shave as much as I could from the interior frames.
On top of these fit tolerances, I also ran into several self-made headaches. Like dripping cyanoacrylate adhesive on the horizontal stabilizer while attaching the dive flaps. Or having a poorly formulated flat finish spit white flecks all over the plane, necessitating a very careful wet sanding of all of the upper surfaces.

Before...
After...
Still, a lot went right. The pre- and post-shading techniques worked like a charm and created a very worn-looking Dauntless. The Vallejo acrylics sprayed like a dream, and the textured Rustoleum provided just the grit I was looking for for the no-slip walkways.

All in all, I’m pleased with the effort, even if a few things didn’t go as planned.
Next…
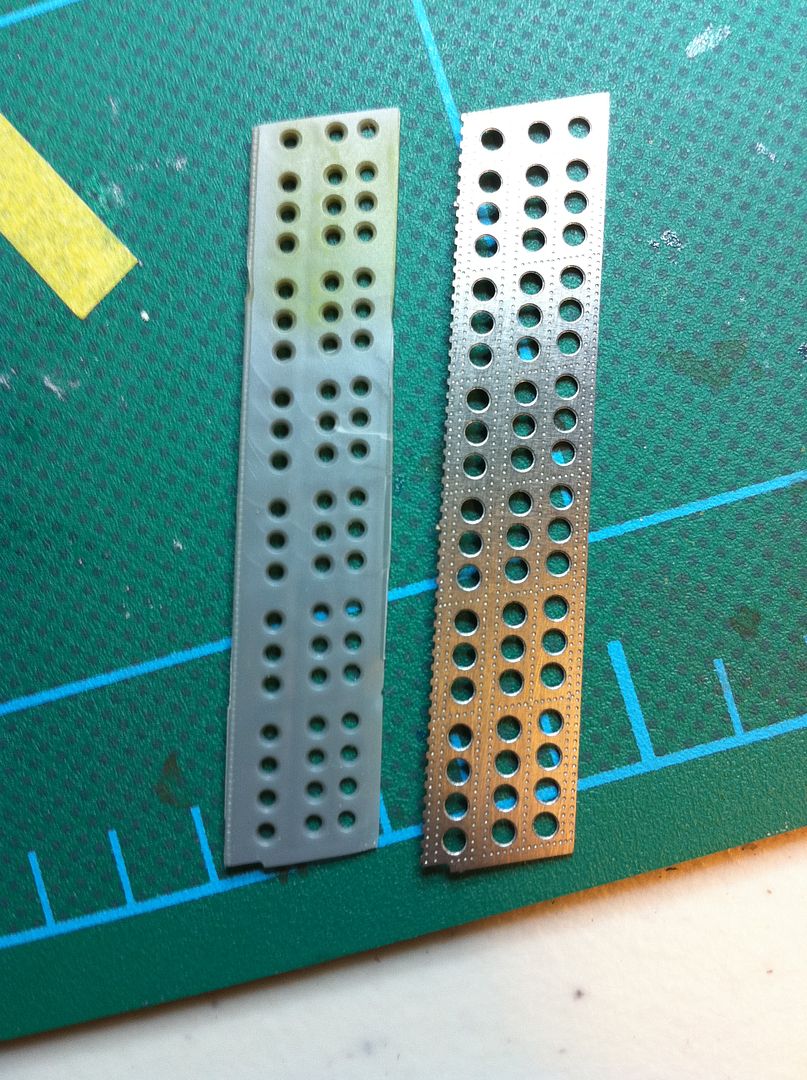
Dauntless Dive Flaps
For the most part, I’m starting to come to the conclusion that most photo etch sets aren’t worth the money.
But Eduard’s SBD Dauntless dive flaps are definitely an exception. The precision and detail versus the kit flaps is just staggering.